This school banner is really taking shape now. I've decided that fusible webbing is my best friend! As long as I don't try to iron it with the wrong side up of course! For extensive machine appliqué like I've used in this project, there really is no substitute. Fusible webbing allows me to place each shape of fabric exactly where I want it and know that it will stay put while I sew around the edges.
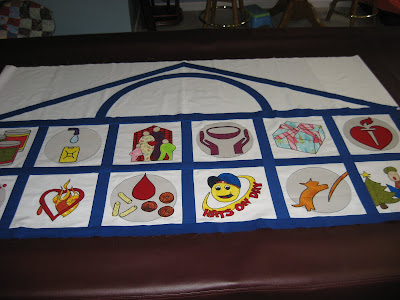
The top part of the banner is what I'll be showing you today. You'll really be able to tell what the final project will look like. Here you go...
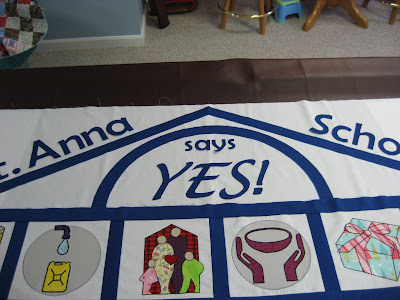
 The angled roof line with the arch in the middle is a very distinctive architectural element at the front door of our school, so I wanted to use that in this banner. The top part of the banner is the same Kona white as the blocks, pieced together in the middle to get the width needed for the banner. Then the straight blue strips are just 1 1/2 inch strips cut from the Kona blue and fused on at an angle. For the arch, I used the old metal ruler pinned at one end and a sharp pencil held at the right markings and then spun around on the paper side of the fusible webbing method of drawing the arch! Then I cut out a rectangle with the arch in it, fused it onto the blue fabric, and then cut out the arch. I found this much easier than trying to cut the arch from the fusible webbing and then from the fabric and then trying to fuse them together. It used up a little more of the blue fabric than I would have liked, but the arch came out much more even than it would have otherwise.
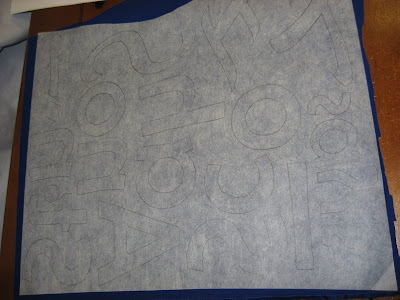 Then it was time for the letters. I played around on the computer with fonts and font sizes until I found just what I was looking for...letters that would look good and be easy to read and also easy to appliqué! Simple, in other words! I printed them out and traced them onto the fusible webbing, making sure I was tracing them mirror image so they would be right when put on the fabric. Then I fused this piece of webbing to a big piece of the blue fabric and let it cool.
 After cutting out all the fused letters, I laid them out on the banner top. Just how I had pictured it in my head! Yes indeed!
 Then it was time for the fun part...I peeled the paper backing off the letters and pinned them all into place for their trip over to the ironing board and their date with the hot iron.
 Make sure you remove your pins before you fuse shapes to fabric or the pin marks will remain in the shapes. I learned that when making my spring table runner a while ago!
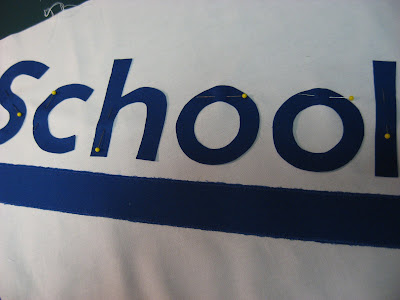 I used my clear cutting ruler as a guide for the placement of the letters so they are all 1/2 inch from the blue strip.
 After fusing all the letters into place, I worked a blue zig zag stitch around each of them in the same manner as the black I did around the pictures in the lower part of the banner.
Next time, I'll show you the pretty fabric I bought at Appleberry Fabrics just up the highway from me for the backing of this banner, and hopefully the finished project as well!
Happy Stitching!
 Click here to return to HookedOnNeedles.com
The top part of the banner is what I'll be showing you today. You'll really be able to tell what the final project will look like. Here you go...
 The angled roof line with the arch in the middle is a very distinctive architectural element at the front door of our school, so I wanted to use that in this banner. The top part of the banner is the same Kona white as the blocks, pieced together in the middle to get the width needed for the banner. Then the straight blue strips are just 1 1/2 inch strips cut from the Kona blue and fused on at an angle. For the arch, I used the old metal ruler pinned at one end and a sharp pencil held at the right markings and then spun around on the paper side of the fusible webbing method of drawing the arch! Then I cut out a rectangle with the arch in it, fused it onto the blue fabric, and then cut out the arch. I found this much easier than trying to cut the arch from the fusible webbing and then from the fabric and then trying to fuse them together. It used up a little more of the blue fabric than I would have liked, but the arch came out much more even than it would have otherwise.
  Then it was time for the letters. I played around on the computer with fonts and font sizes until I found just what I was looking for...letters that would look good and be easy to read and also easy to appliqué! Simple, in other words! I printed them out and traced them onto the fusible webbing, making sure I was tracing them mirror image so they would be right when put on the fabric. Then I fused this piece of webbing to a big piece of the blue fabric and let it cool.
  After cutting out all the fused letters, I laid them out on the banner top. Just how I had pictured it in my head! Yes indeed!
  Then it was time for the fun part...I peeled the paper backing off the letters and pinned them all into place for their trip over to the ironing board and their date with the hot iron.
 Make sure you remove your pins before you fuse shapes to fabric or the pin marks will remain in the shapes. I learned that when making my spring table runner a while ago!
  I used my clear cutting ruler as a guide for the placement of the letters so they are all 1/2 inch from the blue strip.
 After fusing all the letters into place, I worked a blue zig zag stitch around each of them in the same manner as the black I did around the pictures in the lower part of the banner.
 Next time, I'll show you the pretty fabric I bought at Appleberry Fabrics just up the highway from me for the backing of this banner, and hopefully the finished project as well!
Happy Stitching!
Click here to return to HookedOnNeedles.comLabels: applique, charity banner, quilting
posted by Mary Grace McNamara on Friday, April 29, 2011
PermaLink |
5 comments |
Click to comment
![]()
![]()


