My husband is a gadget guy and loves anything that requires plugging in or recharging. You all know the type. So a few years ago when we were planning a road trip half way across the country, he thought it would be a great excuse to purchase a GPS. As it turned out, he was right. It was a great tool for getting us there and back. We've used it for so many trips near and far since then, and I just love it.
We have stored our GPS, cord and dashboard donut in a plastic shopping bag when not in use, and one day after using it, my husband commented that, considering all the bags I design and make for every other purpose, wouldn't it be nice if I designed and made a nice bag for our GPS. So I finally picked out some fun fabric and made one! Hooray for me, and for our now-well-dressed GPS!
Here's a tutorial in case you would like to make a bag for your GPS. It's really easy and requires just basic sewing techniques.
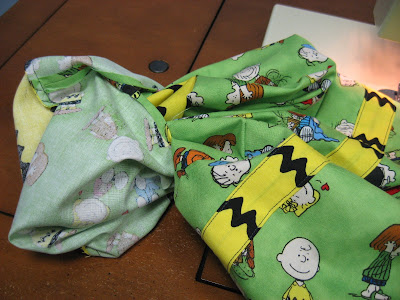
 Here's the finished bag, just so you know what the end product looks like! Do you love the fabric? It gets better too! Just wait until you see the coordinating fabric for the bottom of the bag!
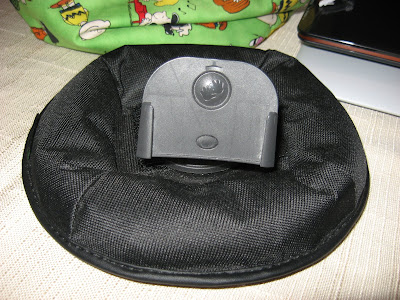 This is our dashboard donut which is heavy and has a kind of tacky non-slip surface on the bottom so it doesn't slide around on the dashboard. The thing sticking up in the middle is where the actual GPS device gets mounted. This piece is separate from the donut and has a suction cup on the bottom so it can be mounted on the window or suctioned into the middle of the donut. It never seemed to stick too well for us, even after applying a few drops of water, so I cut a piece of 2-inch black velcro with adhesive backing. I stuck one part of it to the middle of the donut and the other part of it to the bottom of the suction cup. Now the mount can be removed from the donut or just left in place with the velcro. We just leave it velcroed in place and the mount no longer pops off while we're driving.
Ok, back to the bag...
 Pick out a fabric or two that you like.
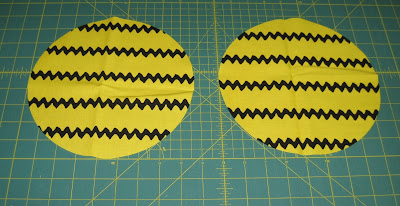
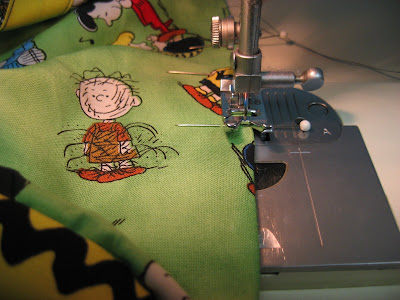
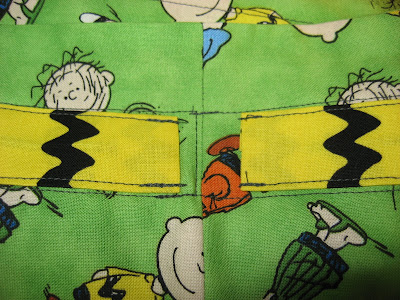
Measure diameter of donut. Mine is 8 inches. Add 1/2 inch for seam allowances. Cut 2 circles of fabric 8 1/2 inches in diameter. Isn't this fabric just too cute? It's Charlie Brown's shirt design!
 Next you will need your high school math. Calculate circumference of the circle you just cut.
Circumference = diameter x pi so...
8.5 x 3.14 = 26.69
Round this up to 26.75 and add half inch for seams = 27 1/4
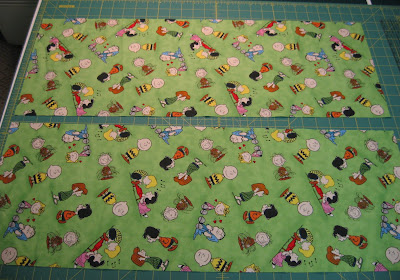
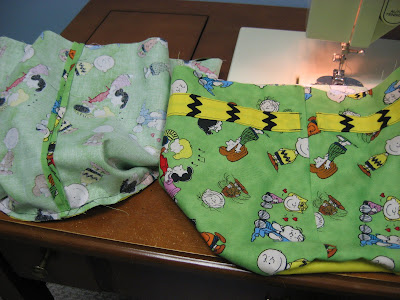
Cut bag outside and lining 27 1/4 x 10. You can use the same fabric for the outside and the lining like I did, or you can use coordinating fabrics, or pieced scraps to make the size needed.
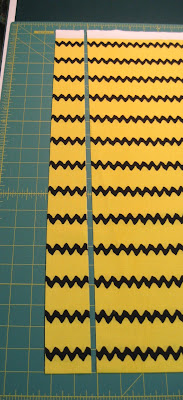 Cut one strip of fabric 27 1/2 x 2 inches out of contrasting fabric for drawstring casing. I used the Charlie Brown shirt design fabric again.
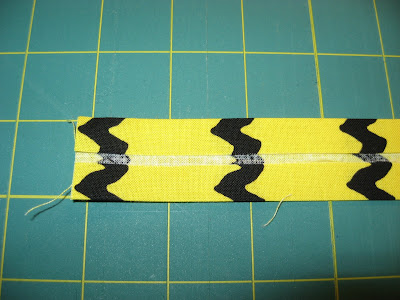 Fold ends in 1/2 inch and press. Then fold long edges to center and press. This picture does not show the ends folded in, but you would want to fold in the ends first and press them before you fold the long edges to the center and press. This makes the ends of the casing neater.
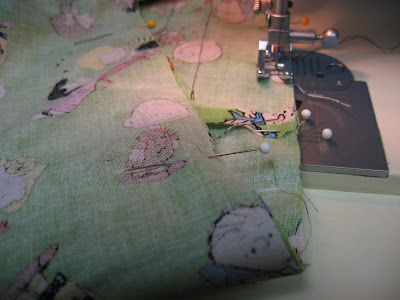
 Place casing on outside rectangle 1 1/2 inches from top and centered side to side. Pin and stitch close to both long folded edges. Do not stitch the short ends of the casing closed!
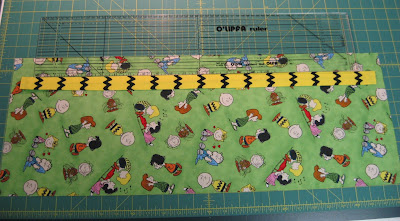 This is where the drawstring cord will be threaded to close the bag.
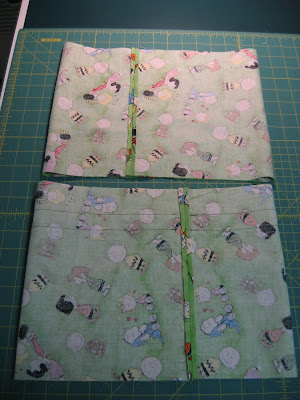 Sew short sides of each rectangle together to make 2 tubes, leaving an opening in the one without the casing, which will be the lining, for turning.
 Mark quarters on each circle base by folding each circle in half and placing a pin at each side, then folding it in half matching the pins and placing pins at each side again. Mark quarters on the bottom of each tube.
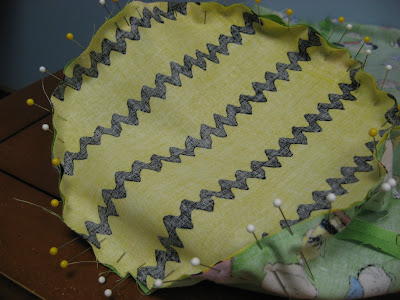 Pin one tube to each base right sides together matching quarter marks, then ease remaining fabric and pin closely. Stitch using a 1/4 inch seam allowance.
 With lining wrong side out and outside of bag right side out, place right sides together and pin around top. Lining will be on the outside and the outside of the bag will be on the inside for this step.
 Stitch around the top edge with a 1/4 inch seam allowance.
 Turn right side out through opening left in side seam of lining.
 Stitch opening closed. Push lining to inside.
 Press top edge. Top stitch around top of bag through outside and lining on both long sides of casing.
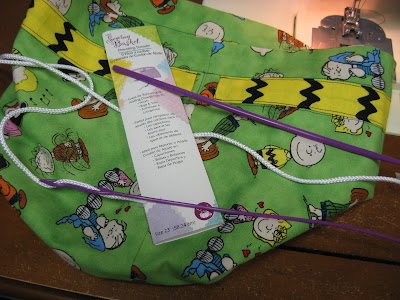 Using a handy drawstring threader like THIS ONE, or your own favorite method, thread cord through casing and cord stop.
 Holding ends together, tie knot in cord.
Ta-dah! One handy dandy GPS bag, all ready for your next big adventure on the open road!
 This bag is big enough to hold the dashboard donut flat in the bottom of the bag, the GPS in its protective case, and the power cord for plugging into the car.
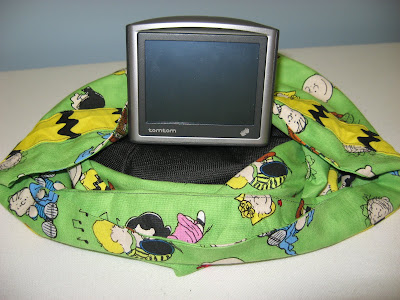 When in use, the bag can just be gathered down around the donut. No need to remove it from the bag! If you find that it slides on your dashboard while inside the bag, just get a circle of that foamy drawer liner stuff and put it between your dashboard and the bag to prevent sliding.
If you make one of these bags for your GPS, I would sure love to see a picture! Tomorrow is the last day of school for my children, so we will be looking forward to our next road trip sometime soon! Happy Summer!
Happy Stitching!
 Click here to return to HookedOnNeedles.com
We have stored our GPS, cord and dashboard donut in a plastic shopping bag when not in use, and one day after using it, my husband commented that, considering all the bags I design and make for every other purpose, wouldn't it be nice if I designed and made a nice bag for our GPS. So I finally picked out some fun fabric and made one! Hooray for me, and for our now-well-dressed GPS!
Here's a tutorial in case you would like to make a bag for your GPS. It's really easy and requires just basic sewing techniques.
 Here's the finished bag, just so you know what the end product looks like! Do you love the fabric? It gets better too! Just wait until you see the coordinating fabric for the bottom of the bag!
 This is our dashboard donut which is heavy and has a kind of tacky non-slip surface on the bottom so it doesn't slide around on the dashboard. The thing sticking up in the middle is where the actual GPS device gets mounted. This piece is separate from the donut and has a suction cup on the bottom so it can be mounted on the window or suctioned into the middle of the donut. It never seemed to stick too well for us, even after applying a few drops of water, so I cut a piece of 2-inch black velcro with adhesive backing. I stuck one part of it to the middle of the donut and the other part of it to the bottom of the suction cup. Now the mount can be removed from the donut or just left in place with the velcro. We just leave it velcroed in place and the mount no longer pops off while we're driving.
Ok, back to the bag...
 Pick out a fabric or two that you like.
Measure diameter of donut. Mine is 8 inches. Add 1/2 inch for seam allowances. Cut 2 circles of fabric 8 1/2 inches in diameter. Isn't this fabric just too cute? It's Charlie Brown's shirt design!
 Next you will need your high school math. Calculate circumference of the circle you just cut.
Circumference = diameter x pi so...
8.5 x 3.14 = 26.69
Round this up to 26.75 and add half inch for seams = 27 1/4
Cut bag outside and lining 27 1/4 x 10. You can use the same fabric for the outside and the lining like I did, or you can use coordinating fabrics, or pieced scraps to make the size needed.
 Cut one strip of fabric 27 1/2 x 2 inches out of contrasting fabric for drawstring casing. I used the Charlie Brown shirt design fabric again.
 Fold ends in 1/2 inch and press. Then fold long edges to center and press. This picture does not show the ends folded in, but you would want to fold in the ends first and press them before you fold the long edges to the center and press. This makes the ends of the casing neater.
 Place casing on outside rectangle 1 1/2 inches from top and centered side to side. Pin and stitch close to both long folded edges. Do not stitch the short ends of the casing closed!
 This is where the drawstring cord will be threaded to close the bag.
 Sew short sides of each rectangle together to make 2 tubes, leaving an opening in the one without the casing, which will be the lining, for turning.
 Mark quarters on each circle base by folding each circle in half and placing a pin at each side, then folding it in half matching the pins and placing pins at each side again. Mark quarters on the bottom of each tube.
 Pin one tube to each base right sides together matching quarter marks, then ease remaining fabric and pin closely. Stitch using a 1/4 inch seam allowance.
 With lining wrong side out and outside of bag right side out, place right sides together and pin around top. Lining will be on the outside and the outside of the bag will be on the inside for this step.
 Stitch around the top edge with a 1/4 inch seam allowance.
 Turn right side out through opening left in side seam of lining.
 Stitch opening closed. Push lining to inside.
 Press top edge. Top stitch around top of bag through outside and lining on both long sides of casing.
 Using a handy drawstring threader like THIS ONE, or your own favorite method, thread cord through casing and cord stop.
 Holding ends together, tie knot in cord.Ta-dah! One handy dandy GPS bag, all ready for your next big adventure on the open road!
 This bag is big enough to hold the dashboard donut flat in the bottom of the bag, the GPS in its protective case, and the power cord for plugging into the car.
 When in use, the bag can just be gathered down around the donut. No need to remove it from the bag! If you find that it slides on your dashboard while inside the bag, just get a circle of that foamy drawer liner stuff and put it between your dashboard and the bag to prevent sliding.
If you make one of these bags for your GPS, I would sure love to see a picture! Tomorrow is the last day of school for my children, so we will be looking forward to our next road trip sometime soon! Happy Summer!
Happy Stitching!
Click here to return to HookedOnNeedles.comLabels: drawstring bag, drawstring threader, GPS bag, sewing, tutorial
posted by Mary Grace McNamara on Thursday, June 14, 2012
![]()
![]()


3 Comments:
This bag is just too darn cute! I love the CB fabric. We don't use a GPS as we have iPhones, which have GPS built in, but it's certainly a great bag. Tonight is the local High School Graduation, and I can hear them all screaming now (it's 8:13 pm as I write this). They will soon start their all night party, so I really need to close all the windows so I can get some sleep.
By Cynthia Gilbreth, At
June 14, 2012 at 11:13 PM
Cynthia Gilbreth, At
June 14, 2012 at 11:13 PM
Cynthia again.
Thank you so much for not requiring that I prove that I'm not a robot!
By Cynthia Gilbreth, At
June 14, 2012 at 11:14 PM
Cynthia Gilbreth, At
June 14, 2012 at 11:14 PM
I looked at a lot of tutorials for making this bag and yours is, by far, the best. Thanks for your clear instructions and photos!
By Lola, At
February 10, 2017 at 4:16 PM
Lola, At
February 10, 2017 at 4:16 PM
Post a Comment
Subscribe to Post Comments [Atom]
<< Home