Hooked on Needles


Thursday, August 30, 2012

Change is Good, Right?


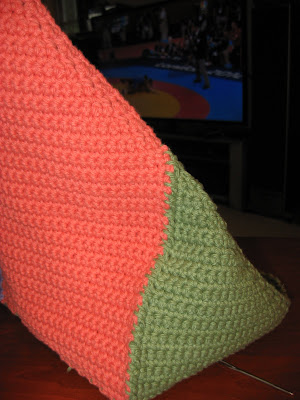
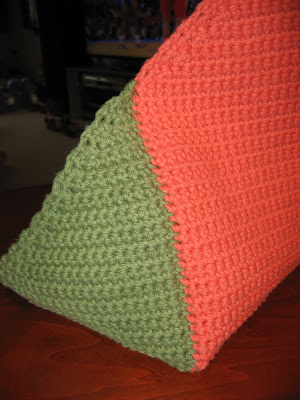
Yesterday I mentioned some changes that would be happening around here soon and this picture should give you a little hint of what those changes might be. Of course you know that my children are going back to school. In fact today is their first day, my son in 4th grade and my daughter, my baby, in 2nd grade. They were both very excited to be getting back to school with their friends and all their new stuff and new teachers and classrooms.

That is not the big news though. The big news is that I am also going back to school. I start next week with a full college course load and I am probably even more excited than my kids were to be starting on this new adventure. It has been about 28 years since I took college courses, so this will be quite an adjustment for me to be in the classroom four days a week and have homework and studying and papers to write and all that school kind of stuff. But I think I'm up to the challenge.

This new schedule will necessitate some changes for Hooked On Needles too. I will have to put my needlework on the back burner, at least while school is in session, so postings here will be scarce. The website will still remain up and running with all my video tutorials and other postings available as always. My etsy shop will remain open with all the items available for sale as well. Custom orders will still be welcome, although delivery dates will have to be open ended as I will not have quite as much time to work on projects while I am in school.

So that's my big news for today! I don't think I'll be able to top that anytime soon! Wish me luck in this new adventure and keep those creative juices flowing! I'll pop in here every now and then with an update. Change is good, and I think this change will be very good!

Happy Stitching!

Click here to return to HookedOnNeedles.com

Labels:

Wednesday, August 29, 2012

Fandango Zig Zag Quilt ~ stepping out of my comfort zone

That Fandango jelly roll had been calling to me for a while. It wanted to become something very badly. My new 60 degree triangle ruler was also calling to be used for something. And then I popped in to the Moda Bake Shop and found this new design called Little Rays of Sunshine.


Fandango Zig Zag Quilt ~ stepping out of my comfort zoneAnd I was ready to go.


Fandango Zig Zag Quilt ~ stepping out of my comfort zoneI organized my jelly roll strips, sewed them together, cut them into triangles, cut the background fabric and started laying out the quilt. So far so good!

In sewing the triangles together, I have discovered the importance of accurate cutting if you want the tips of the triangles to turn out well. Triangles have always intimidated me, but after figuring out what works and what doesn't from sewing the first six strips of triangles together, I feel like I can get the other six done with a minimum of mistakes. The seam ripper has been my friend and constant companion for the last few strips I have sewn, and I will need to rip a few pieces of the first few strips and trim a bit before re-sewing. But now that I know how to spot the problem before sewing, the rest should work out nicely.

Isn't this a fun design? I'm having a good time seeing how the different prints come together and how the zig zag is taking shape. I'll show more pictures as I go along.

And speaking of stepping out of my comfort zone, I have some news to share regarding some big changes coming up here at home. It's all good and positive and wonderful and exciting, but will require a little less time spent on Hooked On Needles stuff. I'll share more next time!

Happy Stitching!

Click here to return to HookedOnNeedles.com

Labels: , , ,

Sunday, August 26, 2012

Divine Knitted Scarf ~ Quick, Easy, No Pattern!

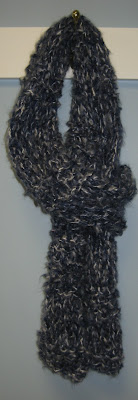
As much as I love crocheting cotton washcloths, after making more than a few dozen plus the swirling bags this summer, it was time for a change. So I switched it up a bit and pulled out a skein of Patons Divine yarn in a lovely denim and my size 17 knitting needles and went to work. Here's what I ended up with...


Divine Knitted Scarf ~ Quick, Easy, No Pattern!This knitted scarf is one of those no pattern kind of projects that just sort of takes shape as you work.


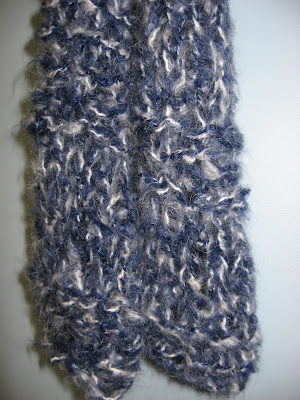
Divine Knitted Scarf ~ Quick, Easy, No Pattern!Since the yarn I used is chunky and fuzzy, knitting a detailed design would have been a waste of effort since it would not show anyway. This one was made by casting on 12 stitches and then knitting the first 6 rows (garter stitch). Then I started alternating knit and purl rows (stockinette stitch) for some number of rows, probably 14 or 16.


Divine Knitted Scarf ~ Quick, Easy, No Pattern!I continued knitting up this skein of fuzzy, chunky yarn, alternating between randomly sized groups of garter stitch and stockinette stitch, until I had just enough yarn left to finish with 6 rows of garter stitch and bind off.


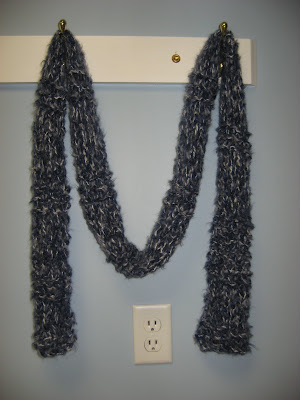
Divine Knitted Scarf ~ Quick, Easy, No Pattern!The finished scarf is 6 x 80 inches, and due to the sections of garter stitch throughout the length of the scarf, it doesn't curl up on the long edges as an all-stockinette stitch scarf would tend to do. And doesn't it look lovely with that oddly placed electrical outlet!

Patons Divine yarn is made of 79.5% acrylic, 18% mohair and 2.5% polyester so hand washing is recommended.

This Divine scarf will be making an appearance over in my Etsy shop soon for a very nominal price since this ball of yarn was leftover from another project, and it was so quick to make! The cold weather is coming soon, and so is the gift giving season. This scarf fits the bill for both!

Happy Stitching!

Click here to return to HookedOnNeedles.com

Labels: , , ,

Monday, August 20, 2012

American Girl Doll Tote Bag ~ A Tiny Tote

Every girl needs a lovely tote bag to carry her stuff around, don't you agree? My 7 year old Grace certainly agrees. She has many bags, made by me, to haul her stuff. You can see a few of them HERE, HERE and HERE.

Recently Grace decided that her doll needed a tote bag too. I showed her my extensive pile of charm squares, separated by color, that I had collected from the many charm swaps I've enjoyed. The only advice I gave her before she started the long search for the perfect little pieces of fabric was that, if she wanted the outside to match on all sides and the inside to match on all sides, she would have to find two matching charms of each fabric. So she picked two pinks and two purples. Are you surprised? She is, after all, a 7 year old girl!


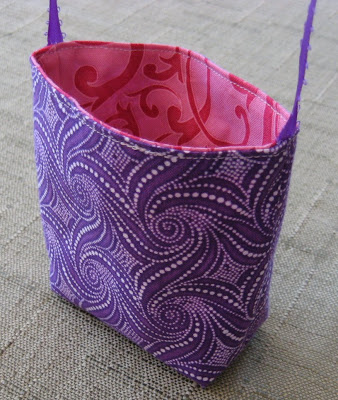
American Girl Doll Tote Bag ~ A Tiny ToteAnd about 8 1/2 minutes later, her doll (named Mary Grace) had her very own tote bag!


American Girl Doll Tote Bag ~ A Tiny ToteUsing my extensive tote-bag-making knowledge shrunk down to very small, I sewed the shell, sewed the lining leaving an opening for turning, boxed the corners, put them right sides together with the ribbon handle in between, sewed around the top, turned it right side out, stitched the opening and stitched around the top and viola! A Tiny Tote Bag for Mary Grace!


American Girl Doll Tote Bag ~ A Tiny ToteThe only trimming I did on the charm squares was at the boxed corners to reduce bulk. Otherwise the 5 inch charms were used full size. I used 1/2 inch as my measurement for boxing the corners. You can see how to do this by clicking HERE.


American Girl Doll Tote Bag ~ A Tiny ToteAnother happy little girl in the house!

Happy Stitching!

Click here to return to HookedOnNeedles.com

Labels: , , ,

Friday, August 17, 2012

Pure (and simple) Zipper Bags

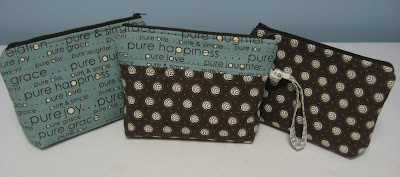
I've been having such fun with the Pure fabric by Moda that I purchased while on vacation recently. You might remember the tote bags I made from some of it, pictured HERE. I had enough leftover fabric to whip up six little zippered accessory bags using this fun fabric too. Here they are...


Pure (and simple) Zipper BagsWell, here are three of them anyway! I made two of each design and couldn't seem to get a good picture with all six.


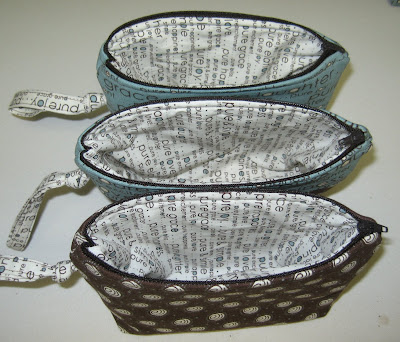
Pure (and simple) Zipper BagsThey are all lined with the white background word fabric, and each bag sports a handy strap on the outside as well.


Pure (and simple) Zipper BagsAll six bags are approximately the same size measuring 2 by 7 inches on the boxed bottom, 5 1/2 inches from bottom to top and 8 inches across the zippered top. The outside fabric is sturdy canvas fused to fleece interfacing and the lining fabric is 100% top quality quilting cotton.

They will all be making an appearance in my etsy shop soon, so be sure to stop over there and check them out, along with all the other handmade lovelies waiting for new homes! As always, if you're local and want to save the cost of shipping, please email me before making a purchase so I can remove the shipping!

Happy Stitching!

Click here to return to HookedOnNeedles.com

Labels:

Thursday, August 16, 2012

Crocheted Swirling Bag ~ A Picture Tutorial

Just recently, I posted pictures of a crocheted bag I made using a free pattern that one of my readers had sent me some time ago. You can see the pictures and read about it by clicking HERE. At about the same time I started making my first swirling bag, another reader, Merry, wrote to me for some advice on working this pattern as she was going to be making it along with some of her crochet friends and wanted to make sure she was leading them in the right direction. So I shared with Merry the things about the pattern that I thought might confuse a beginner, and it occurred to me that a tutorial just might be in order. So here it is...


WARNING: This picture tutorial is very picture heavy!

Crocheted Swirling Bag ~ A Picture TutorialTo begin, print off a copy of the Swirling Bag pattern so you can refer to it and mark it up as necessary. You can find the free pattern by clicking HERE.
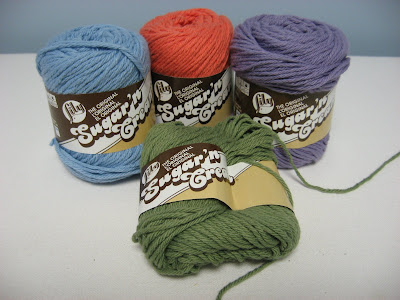
Gather your yarn, either what is recommended in the pattern or a sturdy yarn of your choice. I used the Lily Sugar 'n Cream shown above in the four colors pictured plus one ball of off-white not shown.

Also choose your crochet hook. I used a G hook which is one size smaller than what is recommended for Sugar 'n Cream because I wanted my stitches to be nice and tight. The pattern recommends a size E hook because the recommended yarn is a DK weight cotton, which is much smaller than the worsted weight cotton I used.


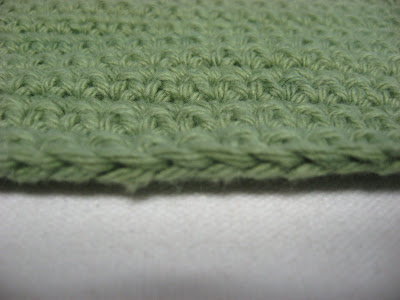
Crocheted Swirling Bag ~ A Picture TutorialWork your beginning chain as the pattern indicates, and then the first row of single crochet stitches. To avoid having holes in this first row, work the single crochet stitches into the back bump of each chain instead of into one or both of the loops on top of the chain. This will create a lovely finished edge, pictured above, which will be easy to stitch into later in the pattern and no holes will be left on this row.


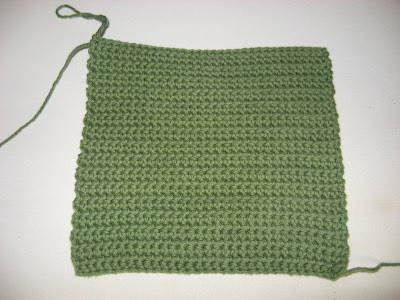
Crocheted Swirling Bag ~ A Picture TutorialWork the indicated number of rows of single crochet, working your stitches through both loops of each single crochet from the row below, and making sure that your stitch count remains the same up until you finish row 32.


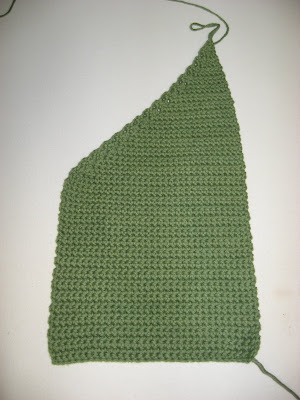
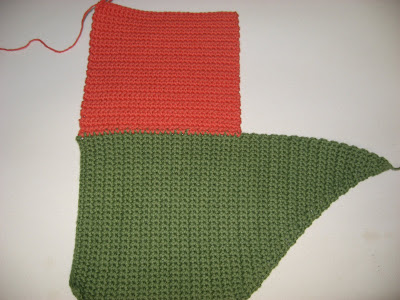
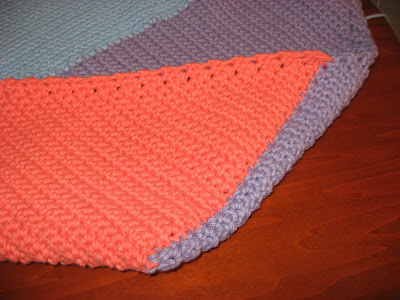
Crocheted Swirling Bag ~ A Picture TutorialThen begin the shaping of the first section as indicated on the pattern. You will be decreasing one stitch at the beginning of the first row, then at the end of the second row, and you will continue alternating like this until you have created this trapezoid shaped piece with the one long edge shown on the right, the short straight edge shown on the left, and the slanted edge joining the two. So the decreasing is done only on one edge of the piece, not on both edges. After you fasten off, make sure to leave a good 18 to 20 inches of yarn which you will use to sew this slanted edge onto the next piece later.


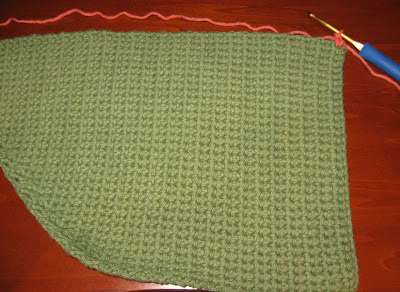
Crocheted Swirling Bag ~ A Picture TutorialNow begin the second section. Just as the pattern says, work along the longest edge of the first section placing one single crochet into the end of each of the first 32 rows. This will be row 1 of the second section.


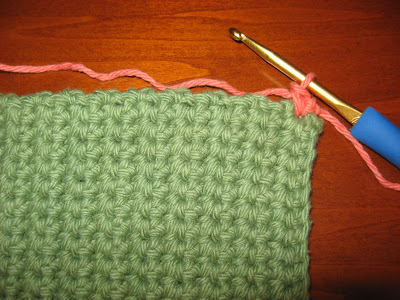
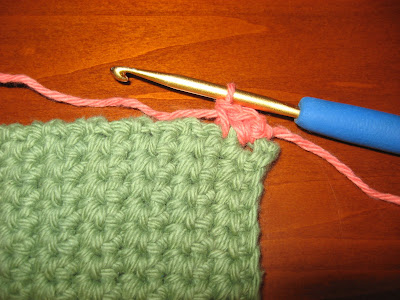
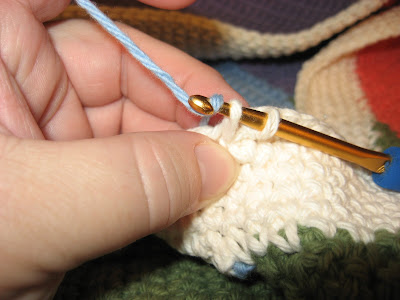
Crocheted Swirling Bag ~ A Picture TutorialWhen I join a new yarn to a row like this, I like to first join with a slip stitch, then work a chain, then the first single crochet into the same space where I worked the slip stitch. It makes for a more substantial join. You do not have to leave a very long tail here, only about 4 or 5 inches. This tail can be stitched over, or woven in later.


Crocheted Swirling Bag ~ A Picture TutorialThen just continue working single crochet stitches into the end of each of the first 32 rows. The above picture shows the first two stitches complete.


Crocheted Swirling Bag ~ A Picture TutorialThis picture, above, shows all 32 single crochet stitches complete for the first row of the second section. The next thing to do would be to chain one and turn, working 31 more rows of single crochet evenly, without increasing or decreasing. Then chain one and turn in preparation for row 33 and the beginning of the slanted edge.


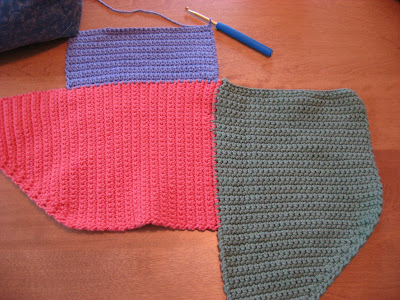
Crocheted Swirling Bag ~ A Picture TutorialWhen you come to the end of row 32, according to the directions, you will follow the instruction for the first section which tells you to decrease at the beginning of the next row. But if you decrease at the beginning of the row, your slanted edge for the second section will be on the wrong side of the piece. All the slanted edges need to be on the same side of each piece, as shown in the diagram at the end of the pattern, sort of like a pinwheel. So in order for the slanted edge to be along the right edge instead of the left edge, just single crochet to the last 3 stitches, single crochet 2 together, single crochet in the last stitch, chain one and turn. At this point you just keep following the same pattern where you decrease on that same side for each row until you have one stitch remaining and then you fasten off, leaving that long tail again for sewing.


Crocheted Swirling Bag ~ A Picture TutorialFor the third section, do the same as for the second, working along the longest edge of the second section.


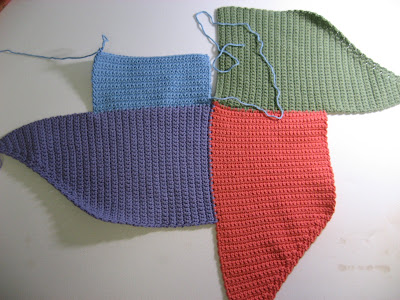
Crocheted Swirling Bag ~ A Picture TutorialWhen you are ready to start the fourth section, you will work it exactly the same way as the previous two, except that you will want to leave a long tail at the beginning which you will not work over or weave in. This long tail is needed to sew the fourth section to the first section. This is where that beginning chain of the first section will come in handy if the first row of single crochets was worked into the back bump of the chain.


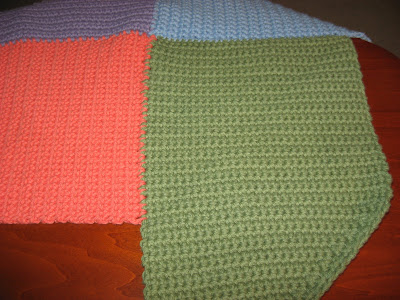
Crocheted Swirling Bag ~ A Picture TutorialSo once you finish the fourth section, making sure to leave that long tail at the end too, you can lay the whole piece out and see where you need to stitch the fourth section to the beginning of the first section.


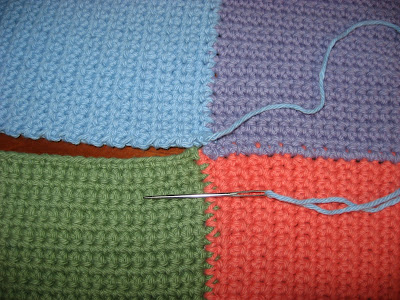
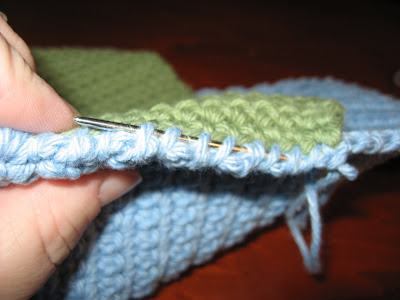
Crocheted Swirling Bag ~ A Picture TutorialSo with right sides together and edges even, and using a blunt point darning needle, stitch the edges together matching each chain from the first section to the end of a row from the fourth section. The pattern calls for using a woven seam as shown in the pattern glossary, but I prefer using a simple whip stitch since I think it looks nice on the right side when finished. Use whichever you prefer.


Crocheted Swirling Bag ~ A Picture TutorialJust continue matching each chain from section one with each row end from section four all the way to the end of the section one chain.


Crocheted Swirling Bag ~ A Picture TutorialKeep going...


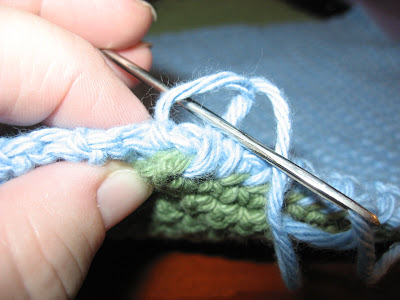
Crocheted Swirling Bag ~ A Picture Tutorial...and when you reach the end, make one more loop with your yarn in the same stitches as your last stitch, leaving the loop open. Put your needle through this loop once and then pull up your yarn to tighten the loop. This will secure the end of the whip stitch.


Crocheted Swirling Bag ~ A Picture TutorialThen run your needle under six or seven of the whip stitches you just did, and pull the tail of the yarn out and clip it off close to the stitching. This hides the tail of the yarn inside the seam of the bag.


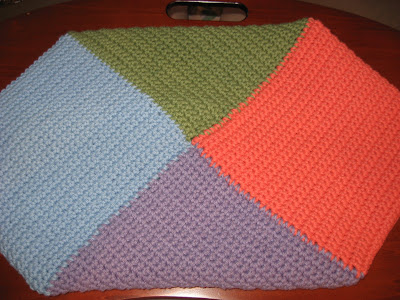
Crocheted Swirling Bag ~ A Picture TutorialNow turn your piece right side up and flatten it out to see the lovely seam you just made and how nicely all four section come together. Are we having fun?


Crocheted Swirling Bag ~ A Picture TutorialNow comes the interesting part that will make this into more of a bag-like structure. Take the tail of yarn left at the point of section one, which is the green section in the picture above...


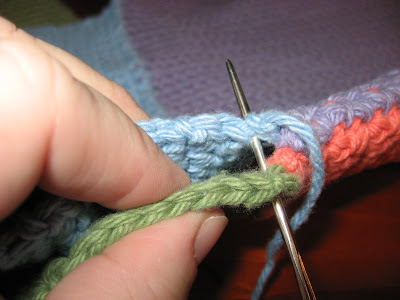
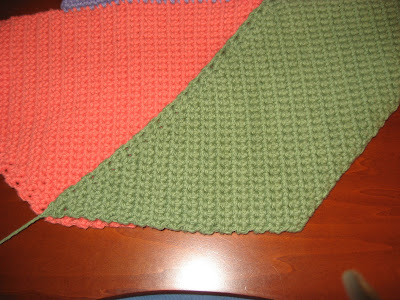
Crocheted Swirling Bag ~ A Picture Tutorial...and fold it over (right sides together) so that the tip of section one is even with row 32 of section two.


Crocheted Swirling Bag ~ A Picture TutorialAt this point, I find it easier to flip the whole thing over so that I can stitch from right to left. You can see in the picture above that the yarn is coming out of the end of row 32 of section two, just before the slant begins.


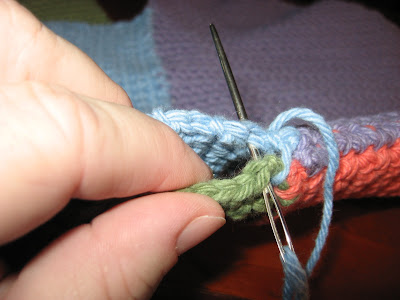
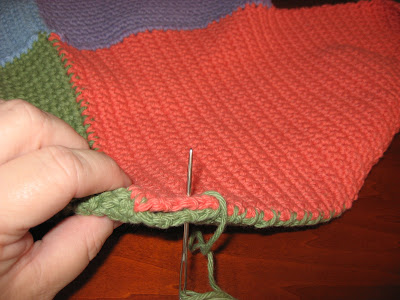
Crocheted Swirling Bag ~ A Picture TutorialNow matching row for row...


Crocheted Swirling Bag ~ A Picture Tutorial...whip stitch towards the beginning row of section two...


Crocheted Swirling Bag ~ A Picture Tutorial<...ending it the same way the previous whip stitch was ended above and weave in the end. Crocheted Swirling Bag ~ A Picture TutorialThis is what the seam will look like from the wrong side...


Crocheted Swirling Bag ~ A Picture Tutorial...and after turning it right side out, this is what it looks like from the right side.


Crocheted Swirling Bag ~ A Picture TutorialNext, join section two to section three in the same way that you joined section one to section two...


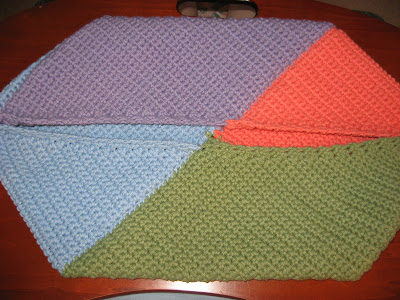
Crocheted Swirling Bag ~ A Picture Tutorial...it gets a little wonky looking at this point! But just keep going! Join section three to section four in the same way...


Crocheted Swirling Bag ~ A Picture Tutorial...and pretty soon this is what your bag will look like from the bottom...


Crocheted Swirling Bag ~ A Picture Tutorial...and here it is when folded flat from the top. Notice how the slant edges from each section now make up the top edge of the bag. Pretty clever design, don't you think?


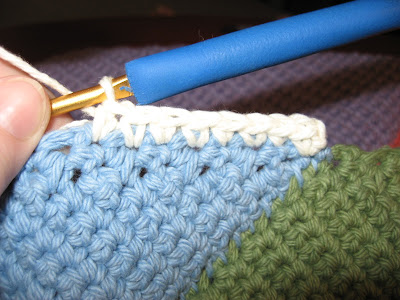
Crocheted Swirling Bag ~ A Picture TutorialFor the remainder of the bag, just follow the instructions as they are written by joining one color to the top of the bag and stitching 33 single crochets evening across each section of the bag for a total of 132 stitches. This is done with the right side of the bag facing you so that the right side of your stitches will be on the outside of the bag.


Crocheted Swirling Bag ~ A Picture TutorialI found that working one stitch into the end of each row, and then one extra squeezed in along the way worked out perfectly.


Crocheted Swirling Bag ~ A Picture TutorialThis is the top edge on one section.


Crocheted Swirling Bag ~ A Picture TutorialWhen you get back around to the beginning of this first round...


Crocheted Swirling Bag ~ A Picture Tutorial...just single crochet into the first single crochet of the round and keep on stitching...


Crocheted Swirling Bag ~ A Picture Tutorial...so that the top section of the bag is done in one continuous spiral, instead of separate rounds.


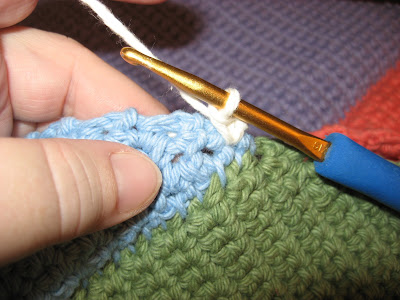
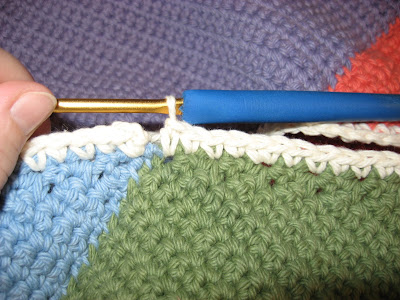
Crocheted Swirling Bag ~ A Picture TutorialYou can put a marker or a piece of scrap yarn at the beginning of each round if you want to, or you can just notice when you have finished six rounds from where you joined the yarn to the top of the bag. In the picture above, you can see where I joined the white yarn to the blue, and you can easily count six rows to the right and six rows to the left of the stitch on the hook.


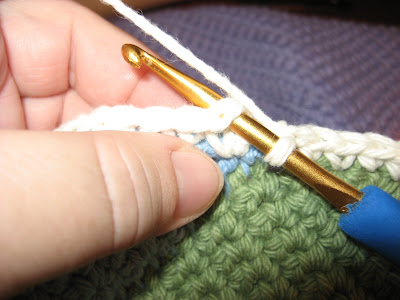
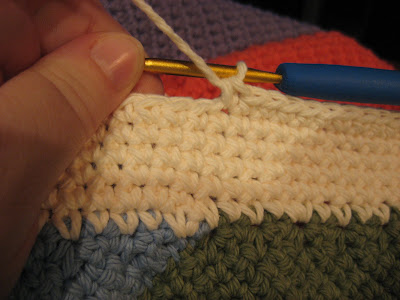
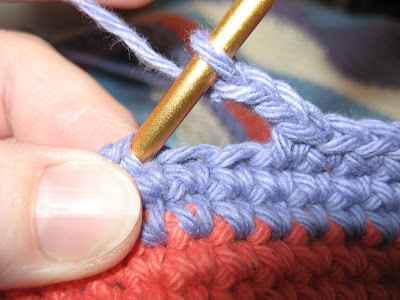
Crocheted Swirling Bag ~ A Picture TutorialTo join the next color of yarn, draw up a loop of the first color (white in this case) and then drop the white and draw up a loop of the new color to finish the single crochet. Cut the white, leaving about a 3 inch tail and knot the white and the blue tails together right up close to the stitch on the inside of the bag, then stitch over the tails or weave them in later.

Continue crocheting in this way until you have worked three 6-round sections and two rounds in the last color.


Crocheted Swirling Bag ~ A Picture TutorialWhen it comes time to work the round for the drawstring eyelets, I do find it helpful to mark the beginning of the round, and as you can see above, I just use a contrasting scrap of yarn through the last stitch.


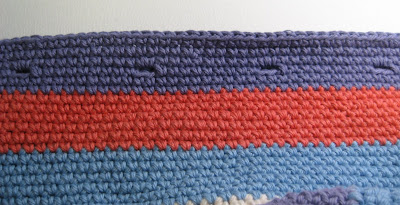
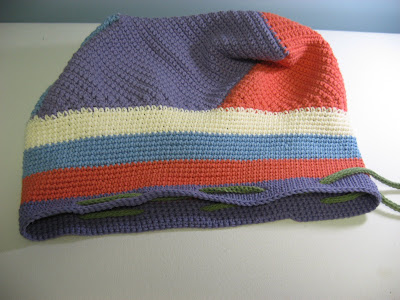
Crocheted Swirling Bag ~ A Picture TutorialTo make the eyelets, crochet up to the indicated stitch count then work two chains. Skip the next two stitches and work the next single crochet into the third stitch. Continue with this round and the next three rounds as indicated in the instructions.


Crocheted Swirling Bag ~ A Picture TutorialThis will create those pretty little holes, or eyelets, evenly around the top of your bag.


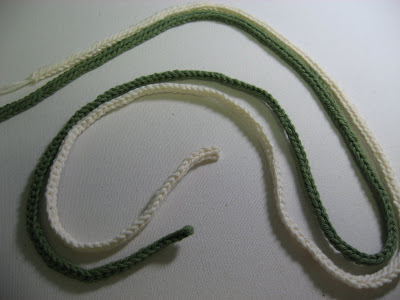
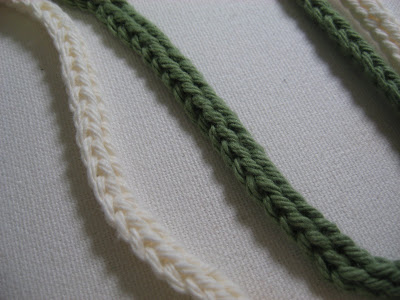
Crocheted Swirling Bag ~ A Picture TutorialMake the drawstring as indicated. The pattern calls for only one, but I prefer a drawstring bag to close by pulling two strings away from each other, so I made two the same, only different colors!


Crocheted Swirling Bag ~ A Picture TutorialThis drawstring was made by working the slip stitch into the back bump of the beginning chains, just as the first row of single crochets in section one. I think this gives the string a more finished look and makes it less stretchy.


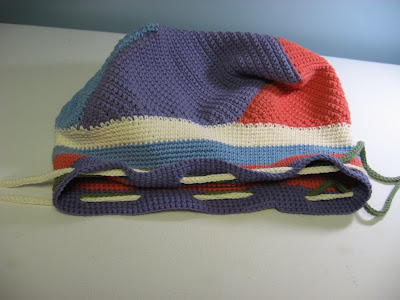
Crocheted Swirling Bag ~ A Picture TutorialI threaded one string around through all the eyelets from one direction...


Crocheted Swirling Bag ~ A Picture Tutorial...and the other string around through all the eyelets from the other direction...


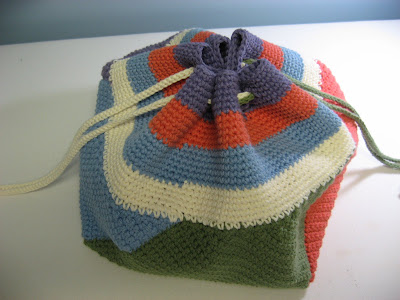
Crocheted Swirling Bag ~ A Picture Tutorial...so that when the strings are pulled away from each other, the bag closes neatly.


Crocheted Swirling Bag ~ A Picture TutorialAnd there it is...my third swirling bag all finished and ready for some serious toting!

If you would like to see my first two swirling bags, click HERE. Now it's time for you to grab some yarn and a hook and make your own swirling bag. There is so much you can do with this pattern to make it your own. You can see that I used five colors of yarn instead of just four for mine, and I also improvised on the drawstrings. You could work the top of the bag in rounds of all the same color if you wanted, or make rounds of different numbers instead of six, which is what Merry did in her bag. You could use variegated yarns mixed with solids by making two opposite sections in variegated and the other two in a coordinating solid and then work the top in a different coordinating solid. So many possibilities! Have fun with it!

Happy Stitching!

Click here to return to HookedOnNeedles.com

Labels: , , ,


Newer Posts Home Older Posts
Copyright ©2010 HookedOnNeedles.com. All rights reserved.