When I last left my Prayer Flag Friendship Braid Quilt, HERE, the two braids had been cut into 9 1/2 inch blocks. That's how wide the braid was, so that's how big I cut the blocks. Remember, I hate to waste fabric! So the problem I had to face was that the blocks were all cut on the bias, making each edge stretchy if not handled carefully. So I had to come up with a way to sew them together without distorting them.
I decided on sashing strips cut 9 1/2 inches long by 2 inches. Here's how it came together...
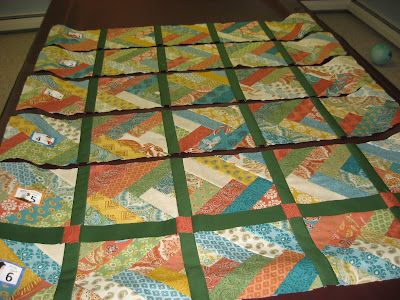 First I pinned calendar pages from my cute little Snoopy daily calendar onto each block from 1 to 30 so that I could keep my blocks in the order that I liked. Then I sewed each row of blocks together with a sashing strip in between each block.
 Once the rows were together, I took off all the little calendar pages from each block and just used one at the end of each row so I could easily keep them in order.
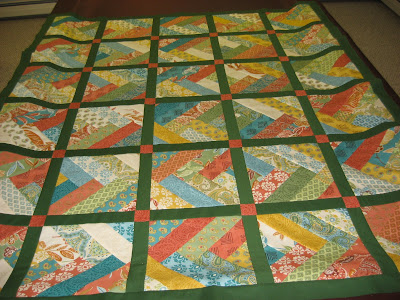 I cut 2 inch squares from the one leftover jelly roll strip which happened to be the lovely paisley print in this soft reddish color. Then I made strips of sashing and little blocks to go between the rows of big blocks. This method is a great way to make sure that the blocks cut on the bias are not stretched when stitched together because the sashing strips are exactly the size that the blocks should be.
My next decision was which fabric to use for the binding...
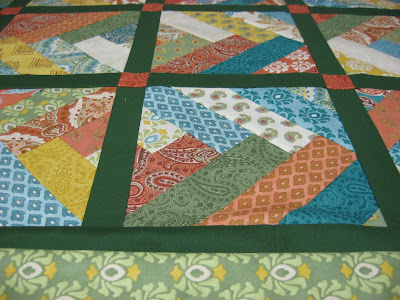 ...this lovely green print which goes so nicely with the dark green Kona solid I used for the sashing...
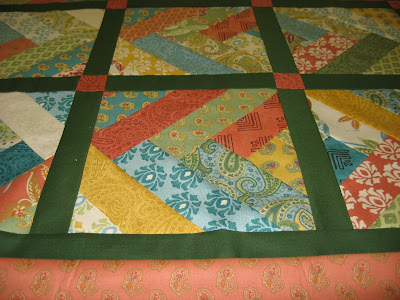 ...or this lovely reddish paisley print which goes so nicely with the little corner sashing blocks.
I decided to go with the reddish paisley for the binding, and the green print for the backing. So the binding is already made and the backing is already pieced. One more ready for the long arm!
Over the weekend, I made a dress for my daughter while testing a pattern for another designer. I can't spill the beans on that project right yet, but as soon as I can, I will certainly share it with you!
Next up will be the fun crochet project, the swirling bag, that I made while on vacation. I'm in the process of making another, taking lots of pictures, and will be writing up a picture tutorial for that project so any beginner will be able to make one too!
Happy Stitching!
 Click here to return to HookedOnNeedles.com
I decided on sashing strips cut 9 1/2 inches long by 2 inches. Here's how it came together...
 First I pinned calendar pages from my cute little Snoopy daily calendar onto each block from 1 to 30 so that I could keep my blocks in the order that I liked. Then I sewed each row of blocks together with a sashing strip in between each block.
  Once the rows were together, I took off all the little calendar pages from each block and just used one at the end of each row so I could easily keep them in order.
 I cut 2 inch squares from the one leftover jelly roll strip which happened to be the lovely paisley print in this soft reddish color. Then I made strips of sashing and little blocks to go between the rows of big blocks. This method is a great way to make sure that the blocks cut on the bias are not stretched when stitched together because the sashing strips are exactly the size that the blocks should be.
 My next decision was which fabric to use for the binding...
 ...this lovely green print which goes so nicely with the dark green Kona solid I used for the sashing...
 ...or this lovely reddish paisley print which goes so nicely with the little corner sashing blocks.
I decided to go with the reddish paisley for the binding, and the green print for the backing. So the binding is already made and the backing is already pieced. One more ready for the long arm!
Over the weekend, I made a dress for my daughter while testing a pattern for another designer. I can't spill the beans on that project right yet, but as soon as I can, I will certainly share it with you!
Next up will be the fun crochet project, the swirling bag, that I made while on vacation. I'm in the process of making another, taking lots of pictures, and will be writing up a picture tutorial for that project so any beginner will be able to make one too!
Happy Stitching!
Click here to return to HookedOnNeedles.comLabels: fabric, friendship braid, jelly rolls, Moda, quilting
posted by Mary Grace McNamara on Monday, August 6, 2012
![]()
![]()


0 Comments:
Post a Comment
Subscribe to Post Comments [Atom]
<< Home