Hooked on Needles


Sunday, January 24, 2016

Crocheted Snowflake Afghan Resurrected for Winter

Crocheted snowflakes are the perfect kind of snowflake! No shoveling, no slick roads, no cold. In fact crocheted snowflakes put together into an afghan can be very warm and cozy, and perfectly delightful to have in a pile in your living room. After last year's ten feet of real snow, we are not looking forward to any of the white stuff this year here in New England. But there's not much we can do about it except prepare and have something to keep us warm. This afghan I'm making would do the trick...


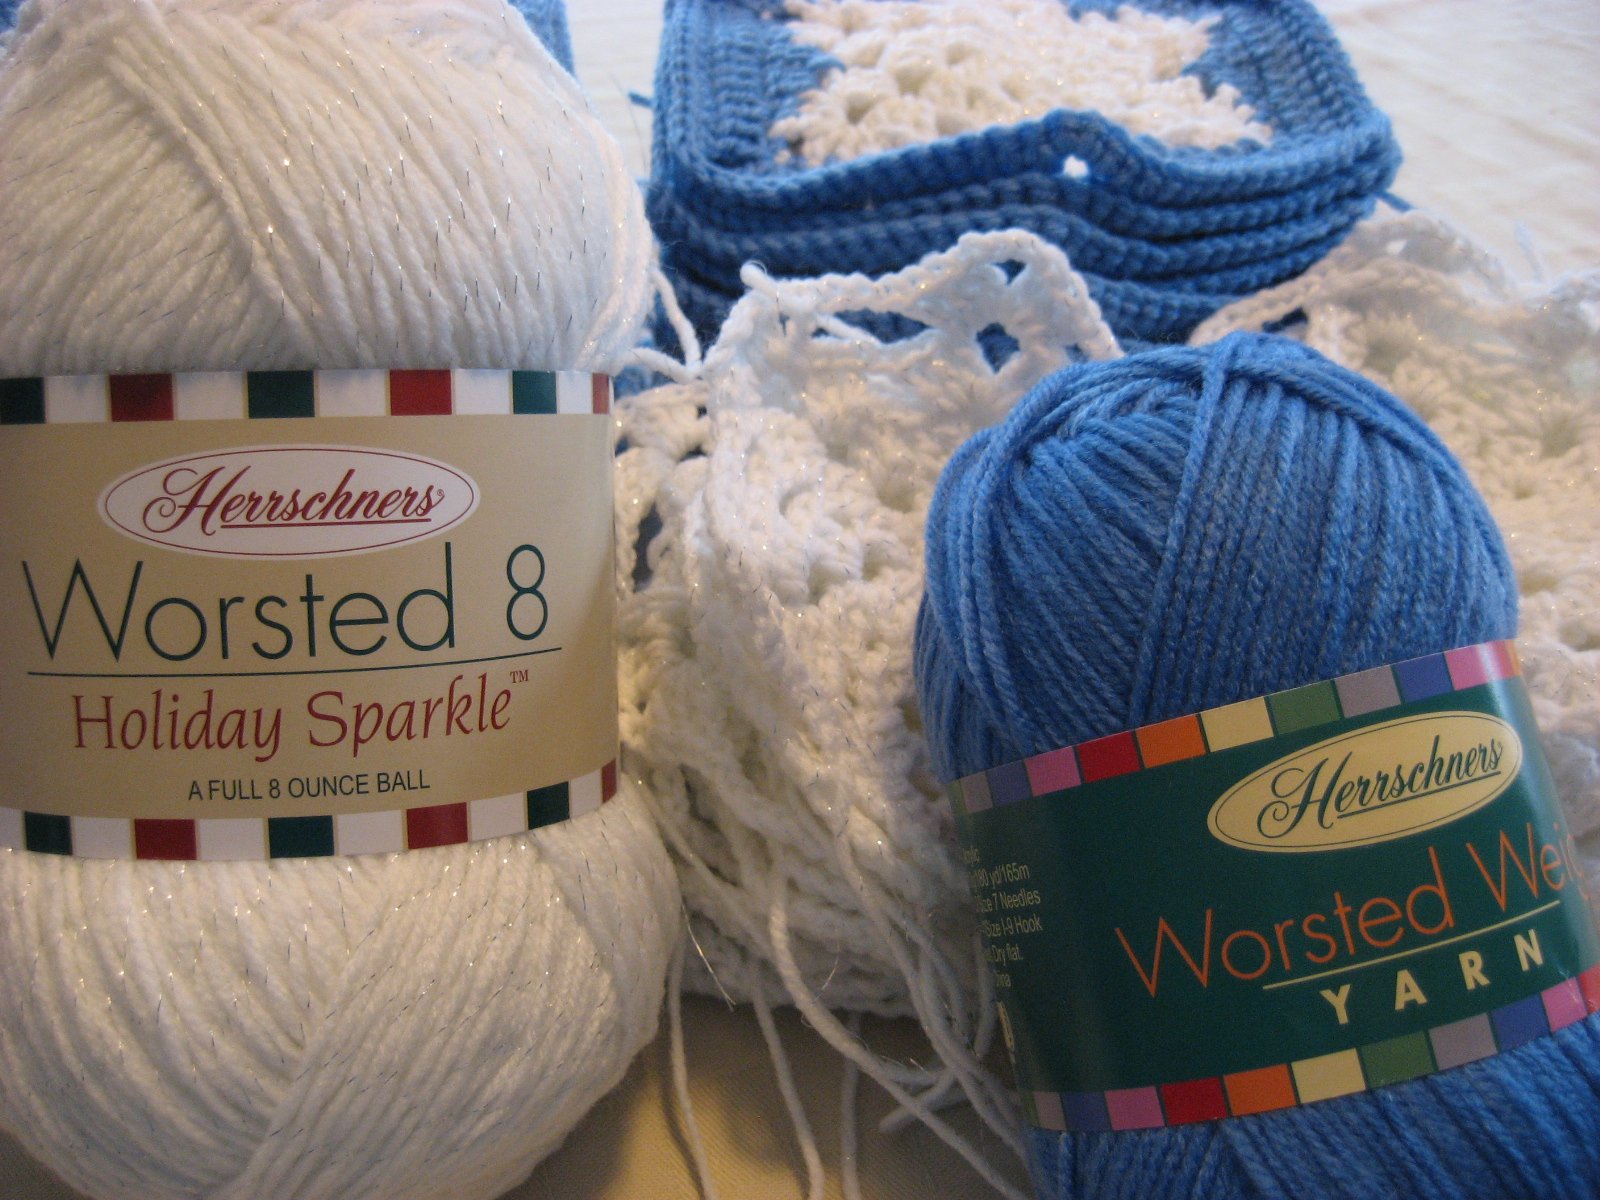
How do you like these snowflakes? They are white and six sided and have a little sparkle to them, but I think that's about where the similarity with real snowflakes ends!

This was a kit I purchased from Herrschner's many years ago on their clearance page. I actually bought two kits since the price was so good, and I like afghans to be much bigger than the throw size that most kits make.

I crocheted all the white middles first a few years ago, and started on the blue outsides of the blocks. Then I put this project away in favor of other projects since this one wasn't for any particular purpose.

But after finishing that scrappy afghan I showed the other day, it was time to resurrect this project and get moving on it again. Now that I am back in school, this is a good project to have waiting for me when I finally relax for the evening. It's quick gratification, taking only about an hour to crochet the blue around the snowflake middle.

Maybe by the time we put our snow shovels away for the season, this afghan will be all put together and ready to show off again. We'll see about that!

Happy Stitching!

Click here to return to HookedOnNeedles.com

Labels: , , , , ,

Friday, January 22, 2016

Scrappy Afghan Finally Finished!

Last fall, I had the intention of using up leftover yarn from this afghan to make a shawl. So I started crocheting my latest favorite stitch, the diagonal box stitch seen HERE and HERE, which starts at one corner and grows into an ever larger triangle making it perfect for a simple shawl design. It didn't quite work out as I had planned since I ran out of yarn long before the piece was big enough to be a useful shawl, so I changed plans and decided this project would be a scrappy afghan instead. I had used Bernat Waverly yarn for a few projects so I started using up the leftovers to make this cozy, colorful, scrappy afghan.


The lightest green section at the lower left in the above picture was the beginning of the project, with a stripe of darker green added to stretch the light green further. Even with the dark green stripe added, it still was not big enough for a shawl. So I used up scraps of browns and tans and then switched to a different green.

I was able to acquire some skeins of this green yarn, and the cream and tan yarns as well, from ebay since Bernat Waverly yarn is no longer manufactured and very hard to find.

This afghan turned out to be approximately 52 by 70 inches, a very nice size for cuddling on the couch or making forts over chairs and coffee tables.


Around the edges, I added a sturdy border of single crochets so the whole afghan is wrapped in the main green color.


This was a very relaxing project to work on through the fall and into the cold winter, and I was a little sad to have finished it just as the bitter cold weather descended upon New England. But it was good to use up some scrap yarn and acquired some new shades of discontinued Bernat Waverly that I really love. Now I have no cozy afghan to keep my lap warm in the evenings, but I am working on another crocheted afghan project that I will share here soon. It's just not at the lap-warming stage yet and probably won't be until the cold weather is on its way out. Aw, that's life!

Happy Stitching!

Click here to return to HookedOnNeedles.com

Labels: , , , ,

Wednesday, January 20, 2016

What a surprise! Pattern for my very first afghan discovered!

A few months ago, probably when I should have been studying, I was roaming around the world wide web and almost fell off my chair when this picture came up.


I could not believe my eyes! Seeing this picture brought me right back to Walnut Creek, California when I was about 10 or 12 years old and I found this exact picture in a magazine. By that age, I had been crocheting for a few years already, but I had never made an afghan. So I showed it to my mother and asked her if I could make it. Keep in mind, this was 40 years ago and I am the fourth of eight children. Buying all that yarn for me most likely was not in the budget, but we went shopping and my mother let me pick out all the yarn for this afghan and she bought it! I don't recall how much it all cost, but I do remember thinking at the time that this was something very special that she was doing for me and that I really wanted to do a good job on this project.

I got right to work and quickly discovered that this kind of crochet was nothing like what my grandmother had taught me! This project is made using the afghan stitch, which I had never seen nor heard of at the time, but I now know it is Tunisian crochet. In fact, I have a number of video tutorials on this wonderful form of crocheting right here at Hooked On Needles. But back then it was unheard of, for me anyway!

I practiced with scrap yarn following the pictures and descriptions in the pattern until I had mastered the stitch. Even my grandmother could not help me since she had never done Tunisian crochet either! And then I made the afghan. What a project it was! It kept me busy and engaged for a long time, and when it was finished, oh what a feeling! You all know what I'm talking about, don't you? That feeling of accomplishment when you have completed a worthwhile task and have something useful and beautiful to show for your time and effort. I still love that feeling!

This afghan was well used and loved for years and years, finally becoming a cozy bed for our sweet and funny dog Daisy who loved it to death. Literally. Daisy was part of our family for 11 years, and when she was gone, the afghan was too. It had been her favorite cozy sleeping place for a lot of years and was no longer fit for anything but the trash. Too many holes, too many trips through the washer and dryer, pieces of it here, there and everywhere. It had served its purpose magnificently. It had been made with Red Heart yarn, which wears like iron, and it held up to all kinds of abuse for 30+ years.

I wrote briefly about it back in 2008 when I first began writing this blog, never thinking I'd find the pattern or a picture of it again. Click HERE to read what I said back then.

If you are interested in this project, click HERE for the pattern. It holds such wonderful memories for me, from my childhood well into my adult life. Maybe it will now for someone else. I hope so.

Happy Stitching!

Click here to return to HookedOnNeedles.com

Labels: , , ,

Monday, January 18, 2016

Quilted Sleeping Bag and Pillows for American Girl Doll

This is another little sewing project I did for Grace's American Girl dolls over my winter break. As nice as all the items made specifically for these dolls are, they really are quite expensive. I had made other things for her dolls in the past, like this cute little doll-sized tote bag, and this big-girl sized bag to carry dolls. So when Grace thought a sleeping bag would be fun for her dolls, I just knew that was something I could make very easily. So I let her pick out her own fabric from the fabric store. Yes, you read that correctly! No stash shopping this time. Fresh new fabric right off the bolt that she got to pick out herself! It's the little things, right? She was thrilled! It took me a couple hours in my greatly neglected sewing room and this is what I came up with...


It's a quilted sleeping bag with matching quilted pillows...


...and it's reversible too!


I even added a little tie at the bottom of the bag on both sides so that it could be tied up neatly into a roll for traveling or storage. I would love to offer a tutorial for this design that I came up with out of my own head, but right now I don't have the time it would take to do it justice. Maybe after graduation. But I will tell you, it is completely reversible with no unfinished seams anywhere and no hand sewing necessary. If you have experience sewing bags and such, you might be able to figure it out on your own. If not, feel free to drop me a line and request a tutorial after May and I might put it at the top of my list!

Happy Stitching!

Click here to return to HookedOnNeedles.com

Labels: , , , , ,

Sunday, January 17, 2016

Productive Time Off, And Back To School Too Soon!

This is my last free weekend before jumping into my last semester of nursing school, so I thought I'd share with you some of the things that I made while on my winter break. The first item had been requested for some time by my 11 year old Grace so it was the first thing I made as soon as I was secure in the fact that I had passed my final exams before Christmas! It's a train case for her American Girl doll hair supplies. She is very much into doing hair these days, and at the time she asked for this she did not know that the American Girl doll Mary Ellen, with long hair, would be under the Christmas tree for her. She was content doing Kit's short hair, and my hair now and then, and her friends' hair at recess in school. She found some patterns and tutorials on Pinterest and picked out some fabric from my stash, and this is what we made...


Isn't that just the cutest little case? The tutorial I used for a guide was this one from a craft blog I had never heard of. It was good for a guide, but I changed a few things to suit my way of sewing. It was the simplest train case design I could find with all straight seams and no curved zippers or three dimensional sewing. It really is a clever design which turns flat sewing into a double-zippered square case, with a handle even!

You can see here that the method of turning the flat sewing into a square case is by boxing the corners, just as in many tote bag tutorials you'll find out there, or in here for that matter!

It's a quilt-as-you-go design, so no lining to deal with, which makes it even easier. I quilted the layers together using straight lines about 3/4 inch apart, and I also used fusible fleece fused to both the outside fabric and the inside fabric so that it would provide a good amount of sturdiness to the finished bag.

Grace just loves it and uses it for all of her new hair supplies for Mary Ellen.

I'll come back tomorrow and show a few more things I worked on over this break, and then after that I will have to disappear for a few months again. Graduation is set for the middle of May and I am so excited for it to come! But between now and then, lots of studying and hard work! It's all worth it though, no question about that!

Happy Stitching!

Click here to return to HookedOnNeedles.com

Labels: , , , ,


Newer Posts Home Older Posts
Copyright ©2010 HookedOnNeedles.com. All rights reserved.