Last time, I shared a little story about my sister asking me to make 27 of these Pillow Quilts, or Quillows, to give to her grandchildren for Christmas. At the end I said I would share a tutorial in case you would like to make one, or ten or a hundred, for yourself or for gifts. They are quite easy to make as long as you have basic sewing skills and tools.
Shall we get started? Just click that bar down a little further that says "click here to read whole post and comments" and you will find the rest of this post with step-by-step instructions and pictures to guide you.
Materials needed for one pillow quilt measuring approximately 42 inches by 58 inches:
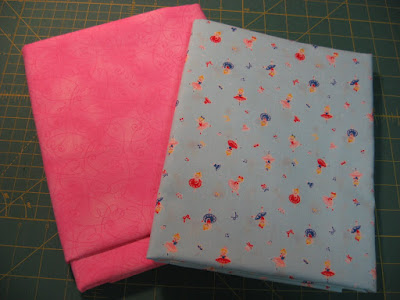 The blue ballerina print fabric is going to be the front of my quilt and the pocket, and the pink fabric is going to be the back of my quilt, so I have two yards of each fabric.
 With fold of fabric towards you, line up fold with straight edge of mat and trim off any uneven edge taking off the least amount of fabric possible, squaring up the cut edge of the fabric.
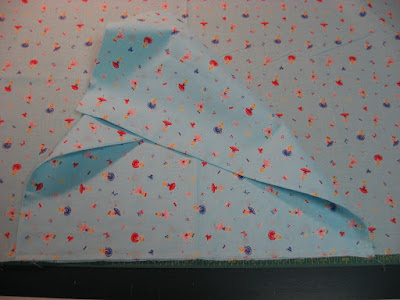
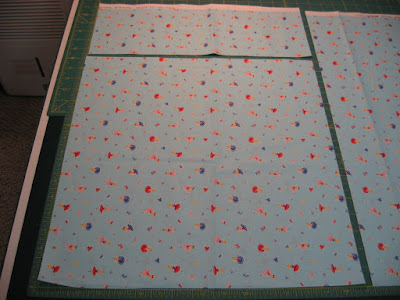 Still with fold of fabric towards you and even with the ruler edge of your cutting mat, cut a 16 inch length of print fabric from fold to selvedge. Then make another cut, this time horizontal and parallel to the fold, 16 inches from the fold. This double layer square will be the pocket that the whole quilt will fold up into to become a pillow. That little rectangle of fabric at the top of the picture is your only piece of scrap from the print fabric.
 Square up the other cut end of print fabric as before, then measure remainder of print fabric and make note of that measurement so you will be able to cut your backing fabric to match. In my example, the remainder of the print fabric measured 59 inches.
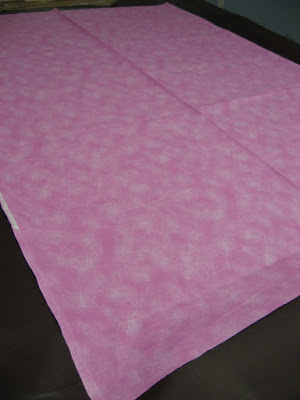
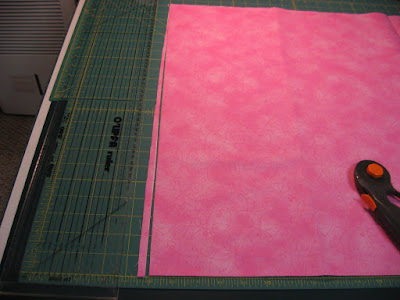 If you are using a solid or coordinating fabric for the backing, lay that fabric out on the cutting mat. Now square up the cut end of the backing fabric just as before. In my example it is the pink fabric.
 Cut a length of backing fabric to match the length of the print fabric. In my example it is 59 inches.
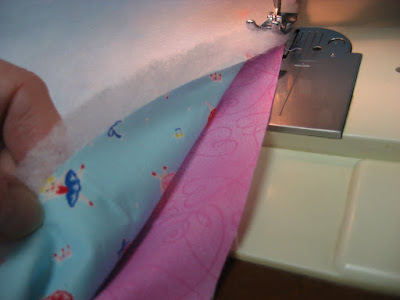
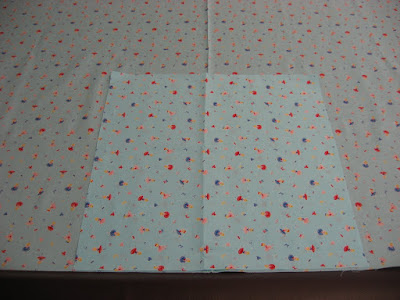 Open up and lay out quilt top with one cut end toward you and right side facing up. Place pocket piece onto quilt top matching cut end of quilt top with cut ends opposite fold on pocket piece. Determine if your print fabric is directional or not by comparing how the design on the pocket piece looks in this orientation compared to the design on the quilt top. If direction is not an issue, as it is not in my example, turn pocket piece right sides together and stitch up the two sides of the pocket using 1/4 inch seam allowance, leaving the bottom edge opposite the fold open for turning. If direction of print is an issue, then turn pocket piece until the print direction on the pocket matches the print direction on the quilt top. Note which raw edge is matched to the raw edge of the quilt top, and stitch the other two raw edges in an "L" to form the pocket. Just be sure to leave one side open for turning.
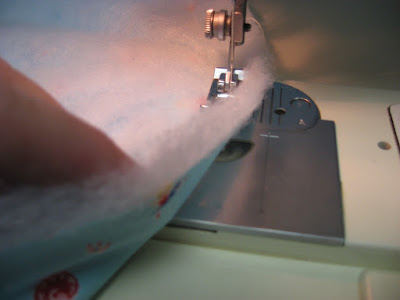
 Clip the corners of the seam allowances to reduce bulk after turning. Turn pocket right side out and press all seams flat.
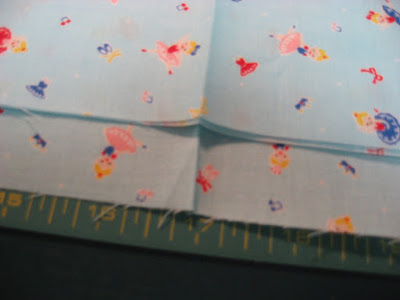
 With raw edges towards you, fold pocket in half and press a center crease into the raw edge. This will allow for easy placement in center of quilt top.
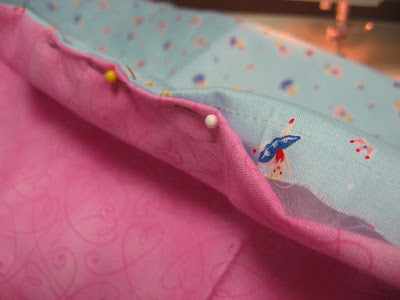
 Place pocket onto quilt top, matching center creases and raw edges.
 Pin along raw edge...
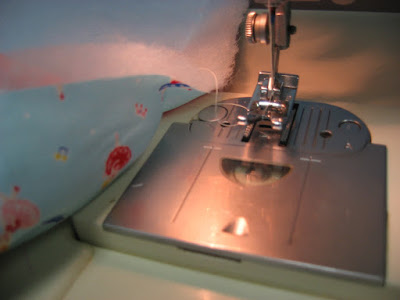
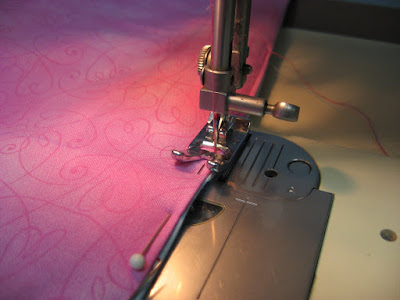
 ...then stitch only along raw edge to attach pocket to quilt top. The other two sides of the pocket will be stitched later, after blanket is complete and quilting is done.
 You can safety pin the pocket to the quilt top to keep it from flopping around if you want to. Just make sure the pocket is flat to the quilt top and the safety pin is on the right side of the quilt top, otherwise you won't be able to remove it later.
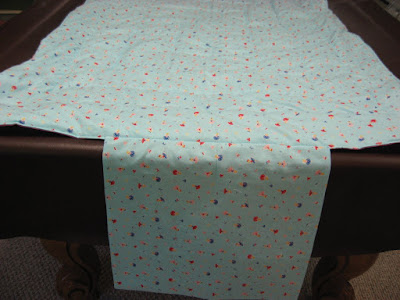
 Now lay out the backing fabric you cut earlier, right side up.
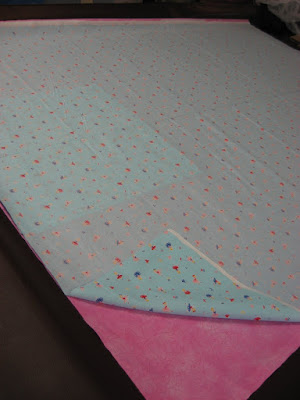 Layer the quilt top, right side down, onto the backing piece. The pocket will be in between the backing and the quilt top. Match raw edges, center creases and selvedges as much as possible. Sometimes fabrics are different widths, so selvedges may not match completely and that's ok. Later the selvedges and extra batting will be cut off.
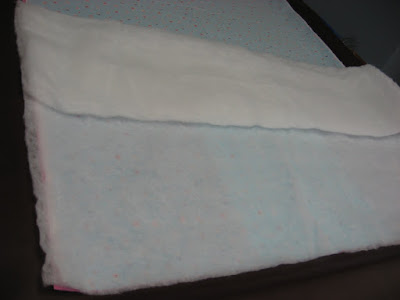
 This is the batting I used for my pillow quilt. You can also piece together scraps leftover from larger projects as long as they are all the same, or cut a piece from a larger batting. Another option is to use an old fleece blanket or piece of fleece that is no longer usable by itself. Whatever you decide to use for batting, lay it over the fabric.
 I liked using the crib size batting as it was so easy to unroll onto the fabric. I lined up the batting with the raw edge of the fabric and started to unroll it...
 ...I kept unrolling it...
 ...until it was flat on top of my fabric.
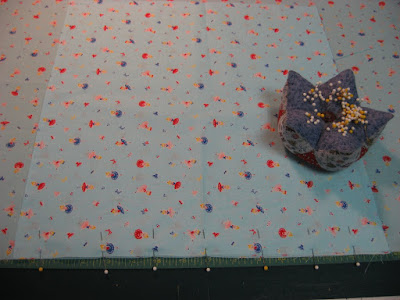
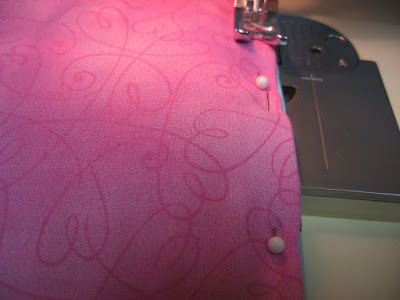
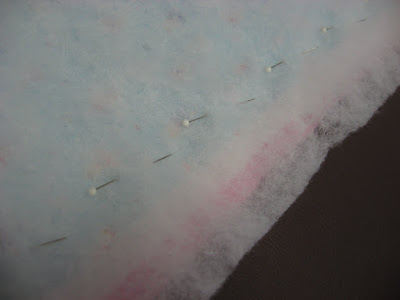 Now pin all layers together all around the quilt. You can see in this picture that my selvedges don't meet, so the pins are well inside the innermost selvedge. This is where you want to stitch so that all the selvedge can be removed leaving about a 1/2 inch seam allowance.
 You may have an overhang of the batting on one end.
 If you do, just trim it off even with the raw edge of the fabric. You can save the scrap for other projects.
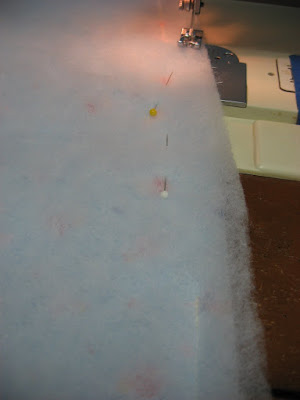
 In the center of the short end opposite the end where the pocket is, I removed two of the pins that were about 8 inches apart and placed them perpendicular to the other pins. These pins will mark the beginning and ending of my stitching, leaving an opening for turning.
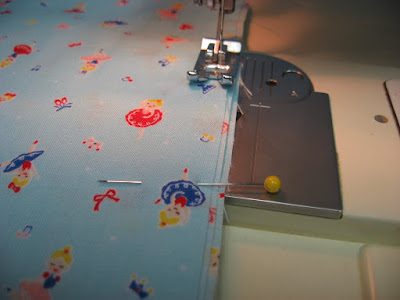
 Now bring all three pinned layers to the sewing machine and start stitching at the horizontal pin closest to you. Be sure to backstitch a few stitches once or twice to secure the beginning of your stitching, then start stitching around the quilt leaving at least a 1/2 inch seam allowance from the raw edges or the inside of the selvedges.
 Remove the vertical pins as they come to the presser foot so you don't sew over them, and continue stitching all around the quilt. In some places, it will seem like you are leaving quite a wide seam allowance, but remember that you have to leave enough to be able to trim off all of the selvedges and still have 1/2 inch left of regular fabric in the seam allowance. Don't worry if it's not exactly perfectly straight and even. That will all get worked out in the turning and once it is quilted and washed and all quilty and fluffy, no one will ever notice a little imperfection!
 When you get back around to the second horizontal pin, backstitch a few times as in the beginning to secure your stitches and cut thread.
 Remove the remaining pins in the opening space and push back the lower fabric in that space which is the pink fabric in my example. It's a good idea to stitch the batting to the quilt top fabric in the opening space for ease of closing after turning.
 Here you can see that the pink fabric has been pushed back out of the way and only the batting and quilt top layers remain.
 Stitch these two layers together in the 8 inch opening space, using about a 3/8 inch seam allowance so that the stitching won't show when this opening is stitched closed, but the batting will stay in place.
 Stitch across the opening space, keeping the lower fabric out of the way of stitching, going almost to the end of the opening. Cut thread. This little stretch of stitching will be inside the quilt in the seam allowance when the project is finished so it is not important to backstitch at both ends.
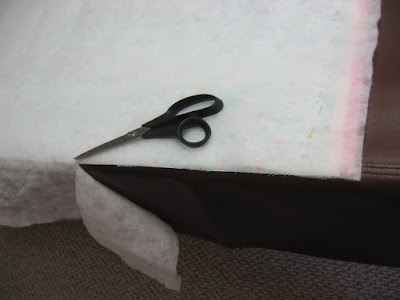
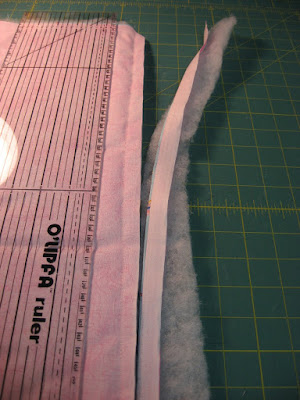 Bring your quilt to the cutting mat and trim off selvedges leaving about a 1/2 inch seam allowance on both long edges.
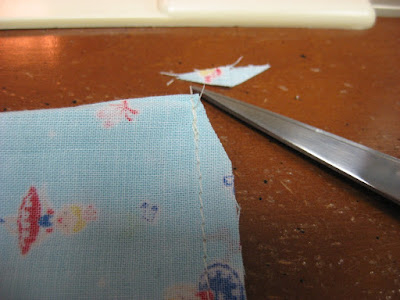
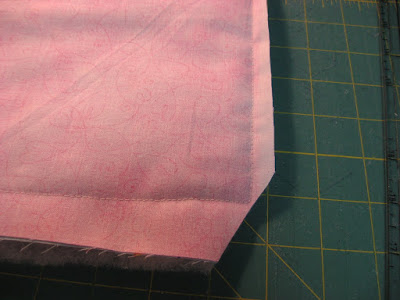 Trim all four corners diagonally to reduce bulk in the corners when turning.
 Now reach into the opening and grab one of the corners on the opposite end of the quilt and pull it through the opening.
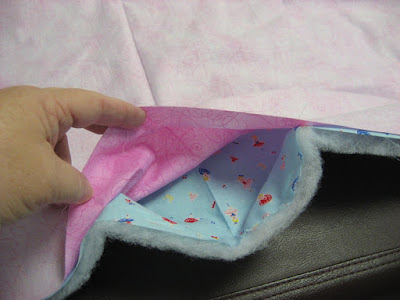
 Keep pulling the quilt out of the opening until the whole thing is turned right side out.
 The opening will be on one short end of the quilt and the pocket flap will be hanging out the other short end of the quilt.
 Pin the opening closed making sure that the basting stitches from where the batting was stitched to the quilt top are hidden inside the seam allowance. You may finger press or iron this first if that makes it easier for you to pin, or just go for it!
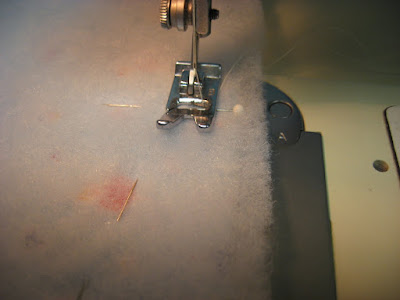
 Now stitch the opening closed about 1/8 inch from folded edges. Continue stitching around the entire edge of the quilt, making sure to pull out the folded edges as you go and maintaining the 1/8 inch space between stitching and folded edges. At this point, you can use a neutral thread color on the top and bottom of the quilt, or you may choose to use thread that matches each side as I have done in my example. Because I had a spool of pink and a bobbin of light blue, I stitched with the quilt back facing up and the quilt top facing down. Position your quilt in whatever way necessary to make the best use of your thread.
 You may also find it easier to pin the edges all around the quilt before stitching, or at least pin the pocket edge so that the pocket flap is pinned to the top side of the quilt. In my example, the pocket was pinned to the blue side of the quilt and the edge stitching went through all layers: backing, batting, quilt top, and the bottom edge of the pocket flap.
 Continue stitching around the entire quilt until you reach the beginning again. Secure stitches by sewing back and forth a few times.
 At this point, you can choose to either tie or sew the quilt layers together referring to the batting package for recommended distance between quilting lines or ties. I chose to machine quilt my example by using a longer stitch length and stitching a continuous line in a sort of rectangular spiral design, just eyeballing my stitching line as I went along. You can stitch in any design you like, or tie your quilt using embroidery floss or yarn, or you could even long-arm quilt if you have that option available.
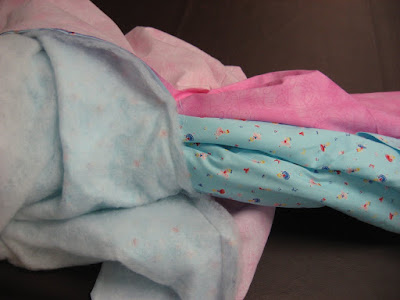
 This is what my quilt looked like after the quilting was complete. Note that the pocket flap is still hanging loose.
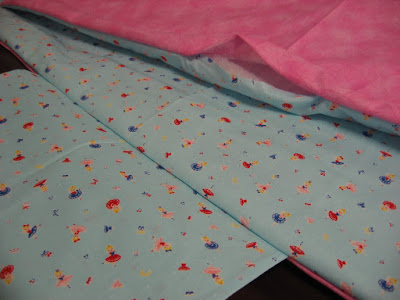
 Lay pocket flap onto the quilt top and pin the two edges.
 Stitch edges through all layers of pocket and quilt about 1/8 inch from pocket edges, securing stitches at beginning and end of each stitching line.
 Here is the pocket stitched to the quilt. Note that the top edge of the pocket is still open as this is where the quilt will fold into to make the pillow.
Your pillow quilt is now complete! Here's how to fold the quilt into a pillow:
 Lay quilt flat with the wrong side up. Fold one long side into the middle.
 Then fold the other long side into the middle.
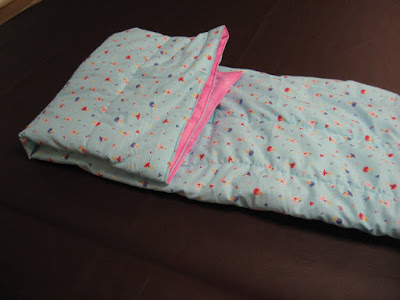 Now fold the edge opposite the pocket towards the middle...
 ...then fold it again so that the fold almost meets the top edge of the pocket.
 Now fold one more time so that the quilt is in a very puffy square-ish shape with the pocket on the bottom.
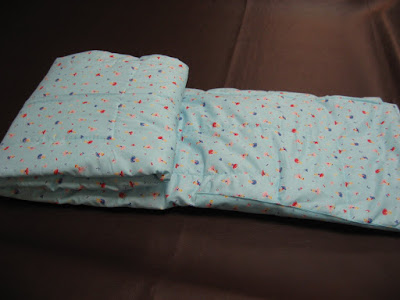
 Flip the whole puffy pile over so that the pocket is on the top. Reach into the inside corners of the pocket and grab the quilt and pull it into the pocket, turning the pocket over the quilt.
 Pull the whole pocket over the quilt, and then reach into the pocket and poke out the inside corners and straighten up the edges to make the pillow smooth and nice.
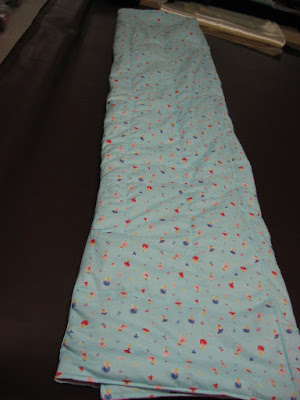
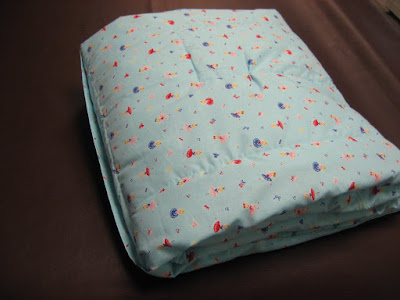
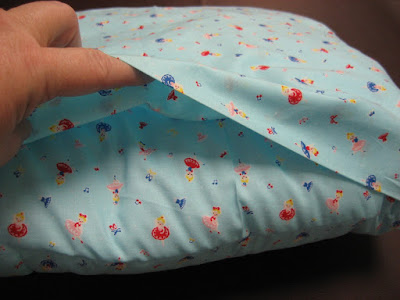
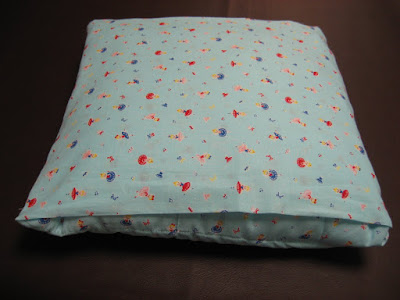 And here you have a cozy compact quilt...
 ...all wrapped up in a pillow!
If you use this tutorial to make a pillow quilt, I would love to know how you liked making it. Please share pictures too! If you have any questions, please don't hesitate to contact me through the comments.
Happy Stitching!
 Click here to return to HookedOnNeedles.com
Shall we get started? Just click that bar down a little further that says "click here to read whole post and comments" and you will find the rest of this post with step-by-step instructions and pictures to guide you.
Materials needed for one pillow quilt measuring approximately 42 inches by 58 inches:
- 4 yards of quilting fabric, either in a single cut of one fabric or two 2-yard cuts of coordinating fabrics
- crib size batting - I used Mountain Mist Soft, Medium-Loft Batting, 45x60 inches
- coordinating thread
- cutting mat, rotary cutter and straight edge
- long quilting pins
- sewing machine


- If you are using the same fabric for front and back of quilt, cut two 60-inch lengths of fabric from what is left after pocket is cut. You should end up with a small piece of fabric leftover to save for another project, about 8 inches or so.


Your pillow quilt is now complete! Here's how to fold the quilt into a pillow:


If you use this tutorial to make a pillow quilt, I would love to know how you liked making it. Please share pictures too! If you have any questions, please don't hesitate to contact me through the comments.
Happy Stitching!
Click here to return to HookedOnNeedles.com Labels: Christmas crafts, pillow, pillow quilt, quilt, sewing, tutorial
posted by Mary Grace McNamara on Sunday, May 26, 2019
![]()
![]()


0 Comments:
Post a Comment
Subscribe to Post Comments [Atom]
<< Home